Tomato Garden Bed Strategy
The most successful tomato garden bed that we have come up with, through years of experimentation and error, has the following features:
1. Raised
2. Lined with 1/4 inch hardware cloth
3. Equipped with a frame on which to attach plastic covering permanently over the top, but with sides that can be raised or lowered depending on the weather.
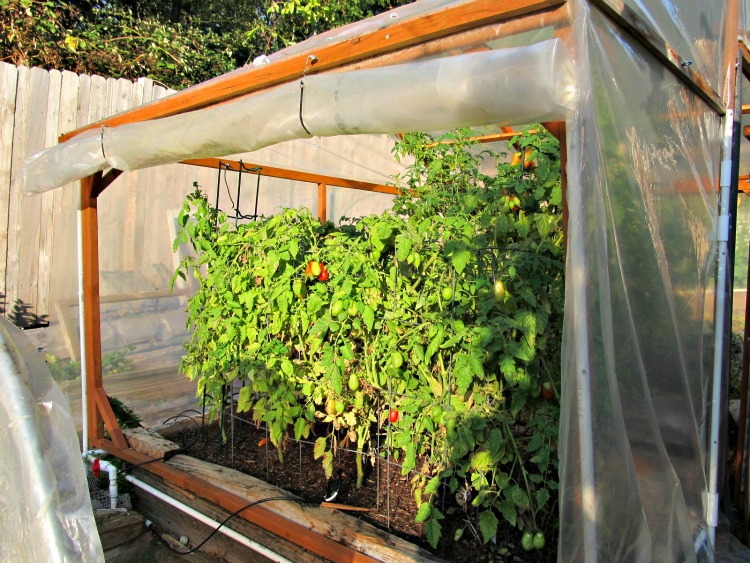 This kind of covered bed allows for earlier planting of starts, longer harvest of fruit and protection from rain that can lead to fungal diseases.
Build a raised tomato garden bed
A raised bed is an area of soil that is raised up higher than the surrounding soil. The main advantage to a raised bed is that the soil inside tends to be several degrees warmer than soil that is not raised. This can be accomplished by just piling up soil in an area or by building walls to contain the soil. The walls can be constructed out of just about anything, but the usual materials are either wood planks or stone bricks.
We prefer walls for our tomato garden bed because:
- The garden looks neater
- Less foot traffic that compacts the soil
- Easier to keep slugs out.
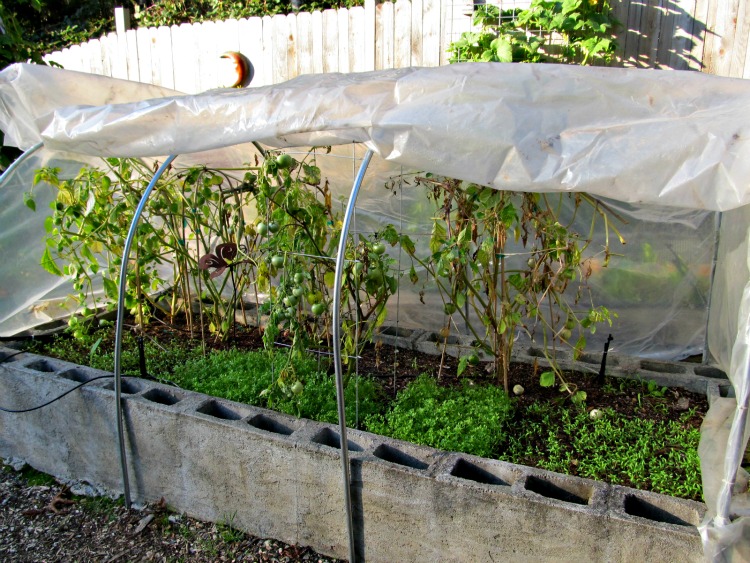 Cinderblocks collect warmth during the day and release it at night, adding even more warmth to the tomato plants' roots.
Line the tomato bed with wire
The purpose of the wire is to minimize damage from burrowing animals because extensive digging will reduce soil contact with plant roots. These animals are attracted to garden bed soil because it's warm, irrigated and extra rich in worms and other organisms they like to eat.
A lot of tunneling also makes irrigation difficult since most of the water takes the path of least resistance (the tunnel) rather than getting absorbed into the soil.
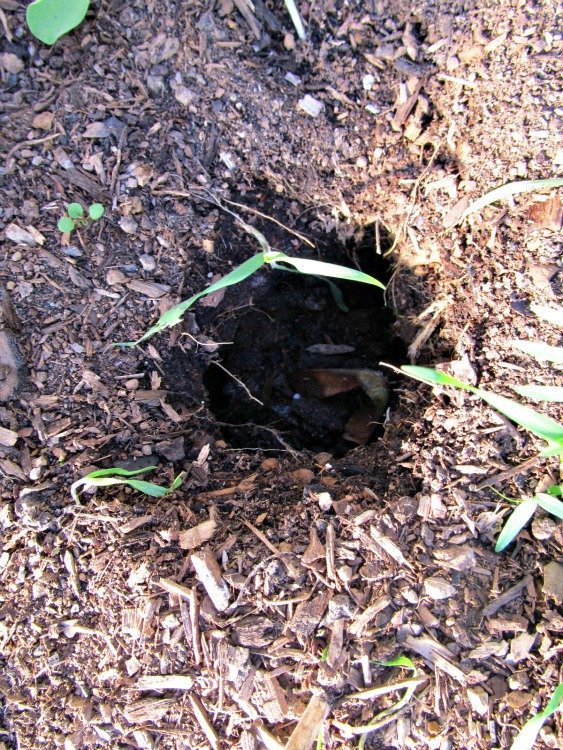
How to install the wire
- Dig down and remove eighteen inches to two feet of soil from the bed, set aside.
- Cut one piece of wire to fit the bottom of the bed and another piece that will wrap around the sides of the bed. Wire these together where they meet so you have a hardware cloth box without a top that fits perfectly into the bed.
- Put all the soil back into the hole, burying the wire box.
Install frame for plastic covering
This can be done using a variety of materials. We have used pvc pipe or metal conduit, and rebar to create hoops to which the plastic can be clipped as well as 1 x 2 wood pieces to build a small house-shaped structure. Both work equally well to protect plants for early planting and longer harvest into the cool fall.

Return to Create Your Tomato Garden
Return from My Tomato Garden Bed Strategy to Grow Tomato Sauce
