Planting Sauce Tomato Plants
Helping my tomato plants adjust right away allows them to quickly get to the business of producing tomato sauce. There are steps you can take to make that happen. Choosing healthy plants and minimizing stress at planting time are the best ways to do that.
Choosing plants
Tomato plants come in many types, shapes and sizes. It doesn't matter whether you grew them from seed or plan to get them from a grower, there are several things to keep in mind when selecting the plants that will grow in your tomato sauce garden.
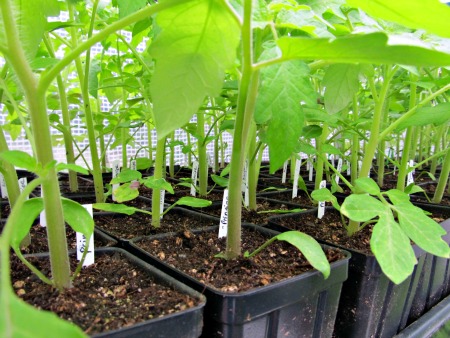 Shorter plants with thick stems may be better to work with than tall, leggy plants.
Choose plants with thick, strong stems and all green leaves. If there are some discolored leaves, it may mean that the plant suffered some stress already in its life and that may affect fruit production. If the cotyledon (baby) leaves at the bottom are yellow and falling off, that's not a problem--those need to go anyway. Make sure the plant is standing tall (no drooping) and that the soil in the pot is plenty moist--that tells you that it's been cared for properly. I like to select shorter, stockier plants rather than tall, gangly ones whenever possible. The taller ones just seem to be more work to plant because there is more stem to bury.
Minimizing plant stress
It's so exciting to see my tomato sauce garden neatly planted with the promise of things to come. However, I know from experience that things can go bad really fast if my plants become stressed.
Harden-off plants
Start with Hardening-off your plants, which just means getting them gently acclimated to the area where they will be planted. Going straight from the greenhouse or indoors to outdoors can be stressfull for plants that are not used to direct sun, breezes, and temperature changes. If you acquired plants from a grower, make sure to ask whether the plants have already been hardened-off. Since my plants are going from my greenhouse to a bed that is enclosed in plastic (essentially another greenhouse), I don't have to worry so much about hardening-off.
Click here for details on hardening-off tomato plants You can decide whether or not you will need to include this step based on your planting situation.
Check weather and frost dates
Next, have you checked to make sure it's safe, weatherwise, to plant your tomatoes? A cool, cloudy day is the best for planting. Also, check with your local agriculture extension office to make sure it's past the last frost date for your area.
Gather supplies
Before digging, you'll want to gather up all the necessary tools to have them handy:
- Sauce tomato plants in pots
- Companion plants (seeds and/or potted plants).
- Scissors or pruners
- Large Shovel
- Hand Cultivator Tool or Trowel
- Water source
- Fertilizer with measuring scoop or spoon. I recommend using an organic fertilizer designed for growing tomatoes.
- Plant supports. Click here for options.
Plant!
Once all of the items above are within reach, the planting will go quickly and easily following these steps:
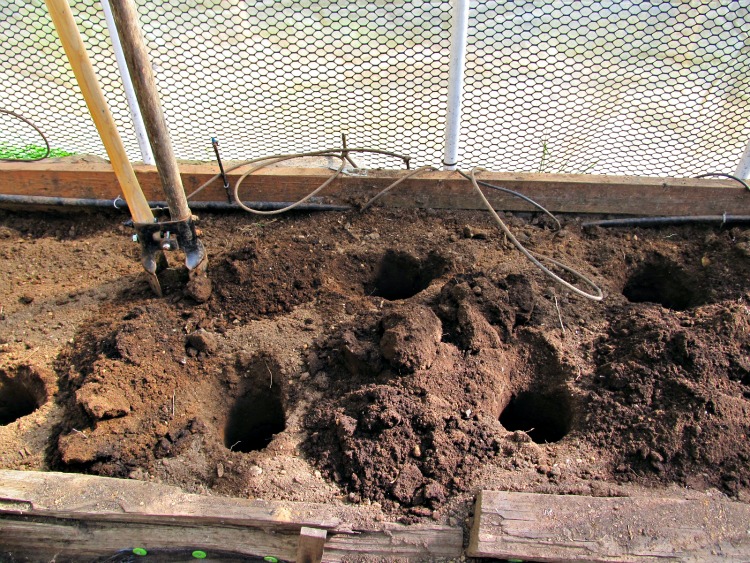 1. Dig a hole for each plant.
I place the holes 10-15 inches apart. The hole should be deep enough to bury the stem of each plant up to about the 3rd or 4th leaf branch. This allows more roots to grow out of the buried stem which are important for supporting the plant and it's sauce production. If your tomato plants happen to be quite tall (I would say, over 18 inches), your best bet would be to plant them trench-style. Click here for tips on trench planting tall tomatoes. Otherwise the hole will be deep in a colder zone of soil possibly causing the plants' roots to get chilled and become stressed.
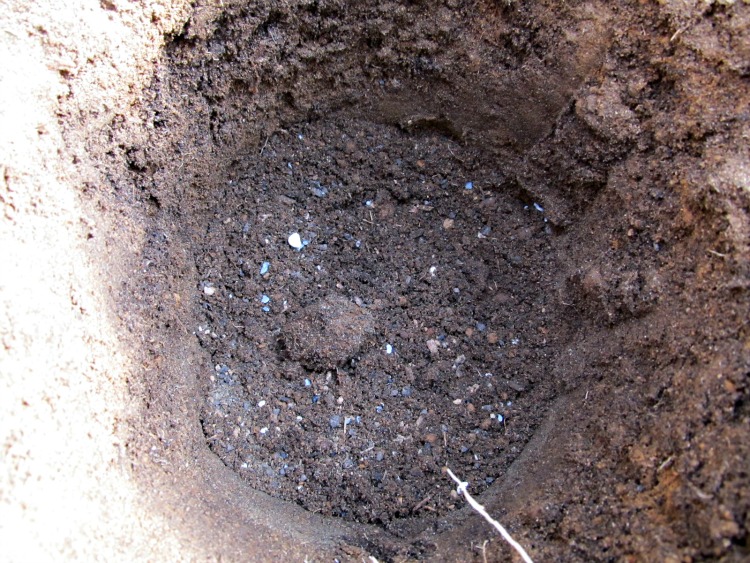 2. Add fertilizer to each hole.
Measure out fertilizer according to directions on the label for transplants and sprinkle it into the bottom of the trench or hole. Scratch it into the soil with the cultivator or trowel and then soak the hole with water.
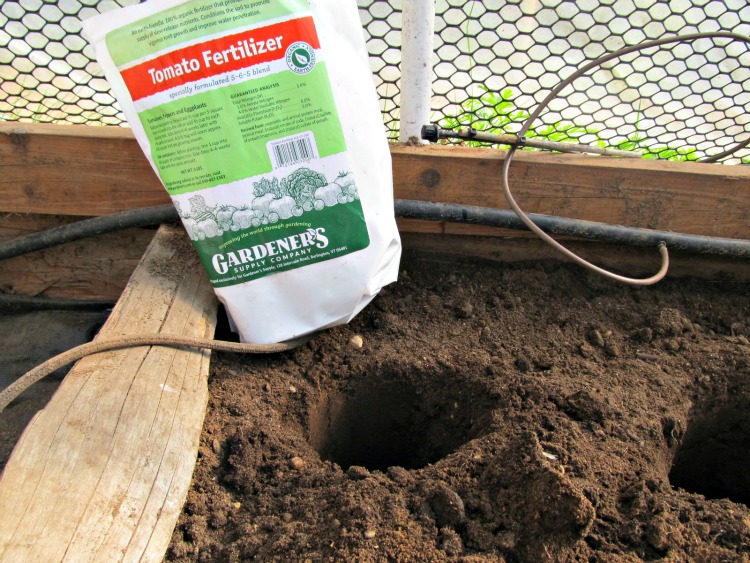 My favorite tomato fertilizer is Gardener's Supply brand.
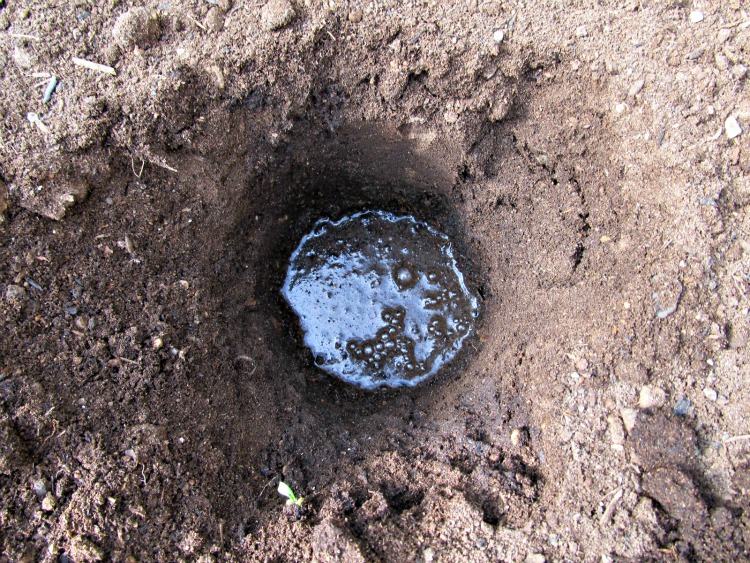 3. Add enough water to fill the hole and then make sure it drains slowly.
If the water drains too quickly, your bed may need more compost mixed in to hold moisture. If it does not drain much at all, you may need to mix in sand to improve drainage.
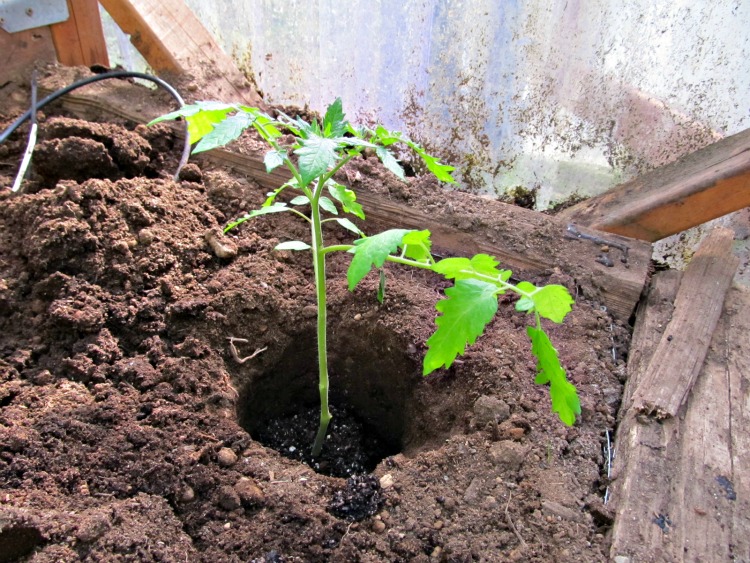 4. Trim off lower 2-3 branches from plant and carefully place in planting hole.
Remove plant from pot without pulling on the delicate stem, place the plant in the hole.
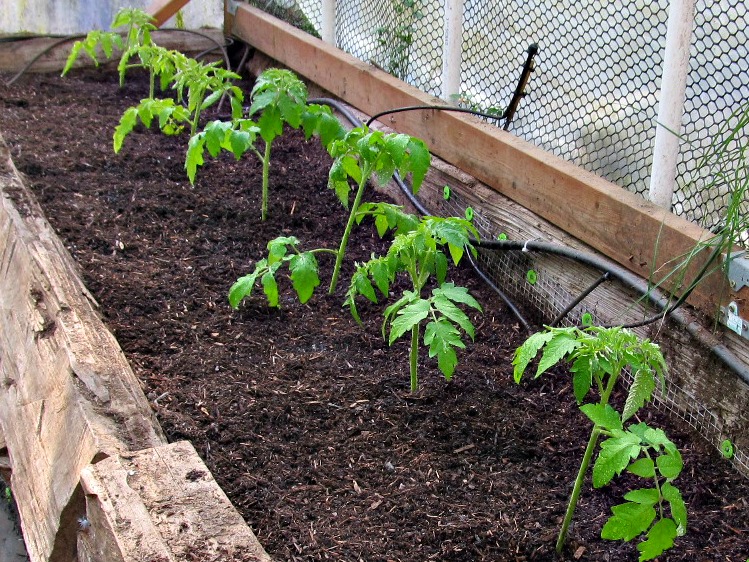 5. Firm-in the soil around each plant. Top bed with mulch if desired.
I prefer to add a layer of Gardner and Bloom "Harvest Supreme" on top of the bed as a mulch layer. It helps hold in moisture and has nutrients that will leach into the soil slowly, but more important to me is that it seems to repel slugs due to the splintery texture of the wood chips in it. You may be able to repel slugs just a well with finely chopped wood chips--especially if they are cedar.
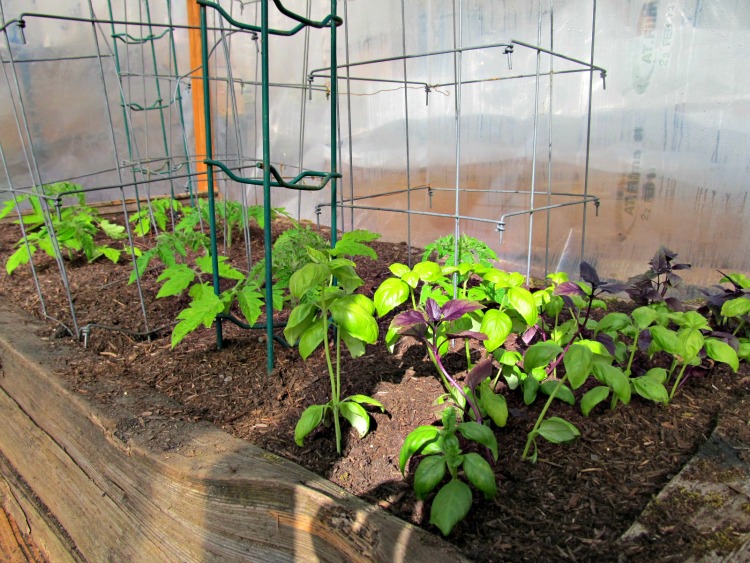 6. Supports and basil as a companion plant.
Place supports around the tomato plants.
Plant companion plants and/or seeds around the tomato plants where they won't disturb the roots.
Set up watering system. I don't water the plants at all for the first couple of days. I already soaked the hole before I planted and that should be enough. Too much moisture around the buried stem can suffocate the plant before it has a chance to develop roots along the stem. But, go ahead and set your watering system in place, if you will be using one.
If you will grow your tomatoes under a cover, now is the time to cover the bed supports in clear plastic, and then attach the plastic to the pvc pipe so it stays put. You can use special clips designed for pvc hoop beds, or binder clips from the office supply store.
